Introduction to Fabric.js. Part 1.

Today I'd like to introduce you to Fabric.js — a powerful Javascript library that makes working with HTML5 canvas a breeze. Fabric provides a missing object model for canvas, as well as an SVG parser, layer of interactivity, and a whole suite of other indispensable tools. It is a fully open-source project, licensed under MIT, with many contributions over the years.
Fabric started around 2010, after discovering the pains of working with native canvas API. The original author was creating an interactive design editor for printio.ru — his startup that allows users to design their own apparel. The kind of interactivity they wanted only existed in Flash apps in those days. Even right now, very few come close to what became possible with Fabric.
Let's take a closer look!
Why fabric?
Canvas allows us to create some absolutely amazing graphics on the web these days. But the API it provides is disappointingly low-level. It's one thing if we simply want to draw few basic shapes on canvas and forget about them. But as soon as there's need for any kind of interaction, change of picture at any point, or drawing of more complex shapes — situtation changes dramatically.
Fabric aims to solve this problem.
Native canvas methods only allow us to fire off simple graphic commands, blindly modifying entire canvas bitmap. Want to draw a rectangle? Use fillRect(left, top, width, height). Want to draw a line? Use a combination of moveTo(left, top) and lineTo(x, y). It's as if we're painting canvas with a brush, layering more and more oil on top, with very little control.
Instead of operating on such low level, Fabric provides simple but powerful object model on top of native methods. It takes care of canvas state and rendering, and lets us work with “objects” directly.
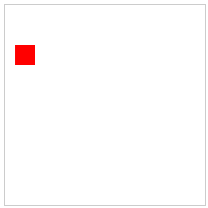
Let's take a look at a simple example demonstrating this difference. Let's say we want to draw a red rectangle somewhere on canvas. Here's how we would do this with native <canvas> API.
// reference canvas element (with id="c")
var canvasEl = document.getElementById('c');

// get 2d context to draw on (the "bitmap" mentioned earlier)
var ctx = canvasEl.getContext('2d');

// set fill color of context
ctx.fillStyle = 'red';

// create rectangle at a 100,100 point, with 20x20 dimensions
ctx.fillRect(100, 100, 20, 20);
Now, let's take a look at doing the same with Fabric:
// create a wrapper around native canvas element (with id="c")
var canvas = new fabric.Canvas('c');

// create a rectangle object
var rect = new fabric.Rect({
  left: 100,
  top: 100,
  fill: 'red',
  width: 20,
  height: 20
});

// "add" rectangle onto canvas
canvas.add(rect);

At this point, there's almost no difference in size — the two examples are pretty similar. However, you can already see how different the approach to working with canvas is. With native methods, we operate on context — an object representing entire canvas bitmap. In Fabric, we operate on objects — instantiate them, change their properties, and add them to canvas. You can see that these objects are first-class citizens in Fabric land.
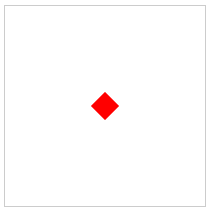
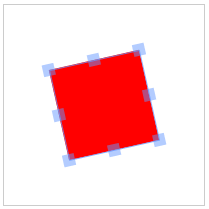
But rendering plain red rectangle is just so boring. We could have at least made something fun with it! Perhaps, rotate slightly?
Let's try 45 degrees. First, using native <canvas> methods:
var canvasEl = document.getElementById('c');
var ctx = canvasEl.getContext('2d');
ctx.fillStyle = 'red';

ctx.translate(100, 100);
ctx.rotate(Math.PI / 180 * 45);
ctx.fillRect(-10, -10, 20, 20);
and now using Fabric:
var canvas = new fabric.Canvas('c');

// create a rectangle with angle=45
var rect = new fabric.Rect({
  left: 100,
  top: 100,
  fill: 'red',
  width: 20,
  height: 20,
  angle: 45
});

canvas.add(rect);
What happened here?
All we had to do in Fabric is change object's “angle” value to 45. With native methods however, things become much more “fun”. Remember that we can't operate on objects. Instead, we tweak positioning and angle of entire canvas bitmap (ctx.translate, ctx.rotate) to suit our needs. We then draw rectangle again, but remembering to offset bitmap properly (-10, -10), so that it's still rendered at the point of 100,100. As a bonus exercise, we had to translate degrees to radians when rotating canvas bitmap.
I'm sure you're starting to see exactly why Fabric exists and how much low-level boilerplate it hides.
But let's take a look at yet another example — keeping track of canvas state.
What if at some point, we wanted to move that now-familiar red rectangle to a slightly different location on canvas? How would we do this without being able to operate on objects? Would we just call another fillRect on a canvas bitmap?
Not quite. Calling another fillRect command actually draws rectangle on top of whatever is already drawn on canvas. Remember I mentioned painting with a brush earlier? In order to “move” it, we'd need to first erase previously drawn content, and then draw rectangle at a new location.
var canvasEl = document.getElementById('c');

...
ctx.strokRect(100, 100, 20, 20);
...

// erase entire canvas area
ctx.clearRect(0, 0, canvasEl.width, canvasEl.height);
ctx.fillRect(20, 50, 20, 20);
And how would we accomplish this with Fabric?
var canvas = new fabric.Canvas('c');
...
canvas.add(rect);
...

rect.set({ left: 20, top: 50 });
canvas.renderAll();
Notice a very important difference. With Fabric, we no longer need to erase the content before attempting to “modify” any content. We still work with objects, simply changing their properties, and then re-render canvas to get a “fresh picture”.
Objects
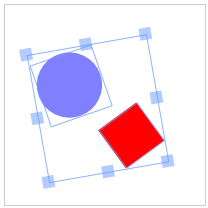
We already saw how to work with rectangles by instantiating fabric.Rect constructor. But of course Fabric covers all the other basic shapes as well — circles, triangles, ellipses, and so on. All of them are exposed under fabric “namespace” as fabric.Circle, fabric.Triangle, fabric.Ellipse, etc.
7 basic shapes provided in Fabric:
Want to draw a circle? Just create a circle object, and add it to canvas. Same with any other basic shape:
var circle = new fabric.Circle({
  radius: 20, fill: 'green', left: 100, top: 100
});
var triangle = new fabric.Triangle({
  width: 20, height: 30, fill: 'blue', left: 50, top: 50
});

canvas.add(circle, triangle);
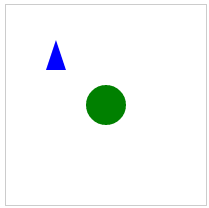
..and there we have a green circle, drawn at 100,100 location and a blue triangle at 50,50 location.
Manipulating objects
Creating graphic objects — rectangles, circles, or something else — is certainly only the beginning. At some point, we will probably want to modify those objects. Perhaps certain action will need to trigger change of state, or play animation of some sort. Or we might want to change object properties (color, opacity, size, position) on certain mouse interactions.
Fabric takes care of canvas rendering and state management for us. We only need to modify objects themselves.
Earlier example demonstrated set method and how calling set({ left: 20, top: 50 }) “moved” object from previous location. In a similar fashion, we can change any other property of an object. But what are those properties?
Well, as you would expect there are those related to positioning — left, top; dimension — width, height; rendering — fill, opacity, stroke, strokeWidth; scaling and rotation — scaleX, scaleY, angle; and even those related to flipping — flipX, flipY and skewing skewX, skewY
Yes, creating flipped object in Fabric is as easy as setting flip* property to true.
You can read any of these properties via get method, and set them via set. Let's try changing some of the red rectangle's properties:
var canvas = new fabric.Canvas('c');
...
canvas.add(rect);

rect.set('fill', 'red');
rect.set({ strokeWidth: 5, stroke: 'rgba(100,200,200,0.5)' });
rect.set('angle', 15).set('flipY', true);

First, we're setting “fill” value to “red”, essentially making object of red color. The next statement sets both “strokeWidth” and “stroke” values, giving rectangle a 5px stroke of pale green color. Finally, we're changing “angle” and “flipY” properties. Notice how each of the 3 statements used slightly different syntax.
This demonstrates that set is a universal method. You will probably use it quite often, and so it's meant to be as convenient as possible.
We've covered setters, and what about getters? Quite obviously, there's generic get method but also a number of specific get* ones. To read “width” value of an object, you would use get('width') or getWidth(). To get a “scaleX” value — get('scaleX') or getScaleX(), and so on. There's a method like getWidth or getScaleX for each of the “public” object properties (“stroke”, “strokeWidth”, “angle”, etc.)
You might notice that in earlier examples objects were created with the same configuration hash as the one we just used in set method. That's because it is exactly the same. You can either “configure” object at the time of creation, or use set method after:
var rect = new fabric.Rect({ width: 10, height: 20, fill: '#f55', opacity: 0.7 });

// or functionally identical

var rect = new fabric.Rect();
rect.set({ width: 10, height: 20, fill: '#f55', opacity: 0.7 });
Default options
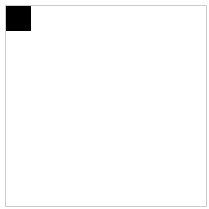
At this point, you might ask — what happens when we create an object without passing any “configuration” object. Does it still have those properties?
Yes, of course. Objects in Fabric always have a default set of properties. When omited during creation, it is this default set of properties that's “given” to object. We can try and see for ourselves:
var rect = new fabric.Rect(); // notice no options passed in

rect.get('width'); // 0
rect.get('height'); // 0

rect.get('left'); // 0
rect.get('top'); // 0

rect.get('fill'); // rgb(0,0,0)
rect.get('stroke'); // null

rect.get('opacity'); // 1
Our rectangle got a default set of properties. It's positioned at 0,0, is of black color, fully opaque, has no stroke and no dimensions (width and height are 0). Because of no dimensions, we can't see it on canvas. But giving it any positive values for width/height would certainly reveal a black rectangle at the left/top corner of canvas.
Hierarchy and Inheritance
Fabric objects do not just exist independent of each other. They form a very precise hierarchy.
Most of the objects inherit from a root fabric.Object. fabric.Object pretty much represents a 2-dimensional shape, positioned in 2-dimensional canvas plane. It's an entity that has left/top and width/height properties, as well as a slew of other graphic characteristics. Those properties that we saw on objects — fill, stroke, angle, opacity, flip*, etc. — are common to all Fabric objects that inherit from fabric.Object.
This inheritance allows us to define methods on fabric.Object and share them among all child “classes”. For example, if you wanted to have getAngleInRadians method on all objects, you would simply create it on fabric.Object.prototype:
fabric.Object.prototype.getAngleInRadians = function() {
  return this.get('angle') / 180 * Math.PI;
};

var rect = new fabric.Rect({ angle: 45 });
rect.getAngleInRadians(); // 0.785...

var circle = new fabric.Circle({ angle: 30, radius: 10 });
circle.getAngleInRadians(); // 0.523...

circle instanceof fabric.Circle; // true
circle instanceof fabric.Object; // true
As you can see, method immediately becomes available on all instances.
While child “classes” inherit from fabric.Object, they often also define their own methods and properties. For example, fabric.Circle needs to have “radius” property. And fabric.Image — which we'll look at in a moment — needs to have getElement/setElement methods for accessing/setting HTML <img> element from which image instance originates.
Working with prototypes to obtain custom rendering and behaviour is very common for advanced projects.
Canvas
Now that we covered objects in more detail, let's get back to canvas.
First thing you can see in all of Fabric examples if creation of canvas object — new fabric.Canvas('...'). fabric.Canvas serves as a wrapper around <canvas> element, and is responsible for managing all of the fabric objects on that particular canvas. It takes an id of an element, and returns an instance of fabric.Canvas.
We can add objects onto it, reference them off of it, or remove them:
var canvas = new fabric.Canvas('c');
var rect = new fabric.Rect();

canvas.add(rect); // add object

canvas.item(0); // reference fabric.Rect added earlier (first object)
canvas.getObjects(); // get all objects on canvas (rect will be first and only)

canvas.remove(rect); // remove previously-added fabric.Rect
While managing objects is the main purpose of fabric.Canvas, it also serves as a configuration host. Need to set background color or image for an entire canvas? Clip all contents to a certain area? Set different width/height? Specify whether canvas is interactive or not? All of these options (and others) can be set on fabric.Canvas, either at the time of creation or after:
var canvas = new fabric.Canvas('c', {
  backgroundColor: 'rgb(100,100,200)',
  selectionColor: 'blue',
  selectionLineWidth: 2
  // ...
});

// or

var canvas = new fabric.Canvas('c');
canvas.setBackgroundImage('http://...');
canvas.onFpsUpdate = function(){ /* ... */ };
// ...
Interactivity
While we're on a subject of canvas element, let's talk about interactivity. One of the unique features of Fabric — that's built right in — is a layer of interactivity on top of all that convenient object model we just looked at.
Object model exists to allow programmatic access and manipulation of objects on canvas. But on the outside, on a user level, there's a way to manipulate those objects via mouse (or touch, on touch devices). As soon as you initialize canvas via new fabric.Canvas('...'), it's possible to select objects, drag them around, scale or rotate them, and even group together to manipulate in one chunk!
If we wanted user to allow dragging something on canvas — let's say an image — all we'd need to do is initialize canvas and add an object on it. No additional configuration or setup required.
To control this interactivity, we could use Fabric's “selection” boolean property on canvas in combination of “selectable” boolean property of individual objects.
var canvas = new fabric.Canvas('c');
...
canvas.selection = false; // disable group selection
rect.set('selectable', false); // make object unselectable
But what if you don't want such interactivity layer at all? If that's the case, you can always substitute fabric.Canvas with fabric.StaticCanvas. The syntax for initialization is absolutely identical; you only use StaticCanvas instead of Canvas.
var staticCanvas = new fabric.StaticCanvas('c');

staticCanvas.add(
  new fabric.Rect({
    width: 10, height: 20,
    left: 100, top: 100,
    fill: 'yellow',
    angle: 30
  }));
This creates a “lighter” version of canvas, without any event handling logic. Note that you still have an entire object model to work with — adding objects, removing or modifying them, as well as changing any of the canvas configuration — all of this still works. It's only event handling that's gone.
Later, when we go over custom build option, you'll see that if StaticCanvas is all you need, you can even create a lighter version of Fabric. This could be a nice option, if you need something like non-interactive charts, or non-interactive images with filters in your application.
Images
Speaking of images…
Adding rectangles and circles on canvas is fun but why don't we play with some images? As you would imagine by now, Fabric makes this easy. Let's instantiate fabric.Image object and add it to canvas:
(html)
<canvas id="c"></canvas>
<img src="my_image.png" id="my-image">
(js)
var canvas = new fabric.Canvas('c');
var imgElement = document.getElementById('my-image');
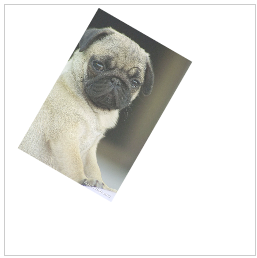
var imgInstance = new fabric.Image(imgElement, {
left: 100,
top: 100,
angle: 30,
opacity: 0.85
});
canvas.add(imgInstance);
Notice how we pass an image element to fabric.Image constructor. This creates an instance of fabric.Image that looks just like the image from the document. Moreover, we immediately set left/top values to 100/100, angle to 30, and opacity to 0.85. Once added to canvas, an image is rendered at 100,100 location, 30 degree angle, and is slightly transparent! Not bad.
Now, what if we don't really have an image in a document, but only a URL of an image? Not a problem. Let's see how to use fabric.Image.fromURL:
fabric.Image.fromURL('my_image.png', function(oImg) {
  canvas.add(oImg);
});
Looks pretty straightforward, doesn't it? Just call fabric.Image.fromURL with a URL of an image, and give it a callback to invoke once image is loaded and created. The callback function receives already-created fabric.Image object as a first argument. At that point, you can add it to canvas or perhaps change first, and then add to canvas:
fabric.Image.fromURL('my_image.png', function(oImg) {
  // scale image down, and flip it, before adding it onto canvas
  oImg.scale(0.5).set('flipX', true);
  canvas.add(oImg);
});
Paths
We've looked at simple shapes, then images. What about even more complex, rich shapes and content?
Meet the power couple — Path and Groups.
Paths in Fabric represent an outline of a shape which can be filled, stroked, and modified in other ways. Paths consist of a series of commands, that essentially mimic a pen going from one point to another. With the help of such commands as “move”, “line”, “curve”, or “arc”, paths can form incredibly complex shapes. And with the help of groups of Paths (PathGroup's), the possibilities open up even more.
Paths in Fabric closely resemble SVG <path> elements. They use the same set of commands, they can be created from <path> elements, and serialized into them. We'll look more closely into serialization and SVG parsing later, but for now it's worth mentioning that you will likely rarely create Path instances by hand. Instead, you'll be using Fabric's built-in SVG parser. But to understand what Path objects are, let's try creating a simple one by hand:
var canvas = new fabric.Canvas('c');
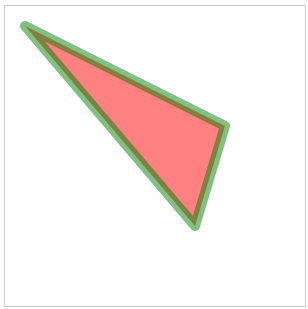
var path = new fabric.Path('M 0 0 L 200 100 L 170 200 z');
path.set({ left: 120, top: 120 });
canvas.add(path);

We're instantiation fabric.Path object, passing it a string of path instructions. While it looks cryptic, it's actually easy to understand. “M” represents “move” command, and tells that invisible pen to move to 0, 0 point. “L” stands for “line” and makes pen draw a line to 200, 100 point. Then, another “L” creates a line to 170, 200. Lastly, “z” tells forces drawing pen to close current path and finalize the shape. As a result, we get a triangular shape.
Since fabric.Path is just like any other object in Fabric, we were also able to change some of its properties. But we can modify it even more:
...
var path = new fabric.Path('M 0 0 L 300 100 L 200 300 z');
...
path.set({ fill: 'red', stroke: 'green', opacity: 0.5 });
canvas.add(path);
Out of curiosity, let's take a look at a slightly more complex path syntax. You'll see why creating paths by hand might not be the best idea.
...
var path = new fabric.Path('M121.32,0L44.58,0C36.67,0,29.5,3.22,24.31,8.41\
c-5.19,5.19-8.41,12.37-8.41,20.28c0,15.82,12.87,28.69,28.69,28.69c0,0,4.4,\
0,7.48,0C36.66,72.78,8.4,101.04,8.4,101.04C2.98,106.45,0,113.66,0,121.32\
c0,7.66,2.98,14.87,8.4,20.29l0,0c5.42,5.42,12.62,8.4,20.28,8.4c7.66,0,14.87\
-2.98,20.29-8.4c0,0,28.26-28.25,43.66-43.66c0,3.08,0,7.48,0,7.48c0,15.82,\
12.87,28.69,28.69,28.69c7.66,0,14.87-2.99,20.29-8.4c5.42-5.42,8.4-12.62,8.4\
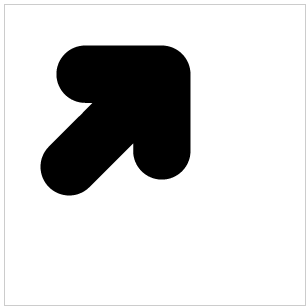
-20.28l0-76.74c0-7.66-2.98-14.87-8.4-20.29C136.19,2.98,128.98,0,121.32,0z');
canvas.add(path.set({ left: 100, top: 200 }));
Oh boy, what's going on here?
Well, “M” still stands for “move” command, so the pen starts its drawing journey at “121.32, 0” point. Then there's “L” command that brings it to “44.58, 0”. So far so good. What's next? “C” command, which stands for “cubic bezier”. It makes the pen draw bezier curve from current point to “36.67, 0” one. It uses “29.5, 3.22” as control point at the beginning of a line, and “24.31, 8.41” as the control point at the end of the line. This whole thing is then followed by a dozen of other cubic bezier commands, which finally create a nice-looking shape of an arrow.
Chances are, you won't be working with such “beasts” directly. Instead, you might want to use something like fabric.loadSVGFromString or fabric.loadSVGFromURL methods to load entire SVG file, and let Fabric's SVG parser do its job of walking over all SVG elements and creating corresponding Path objects.
Speaking of entire SVG documents, while Fabric's Path usually represent SVG <path> elements, a collection of paths that are often present in SVG documents, are represented as Groups (fabric.Group instances). As you can imagine, Group is nothing but a group of Paths and other objects. And since fabric.Group inherits from fabric.Object, it can be added to canvas just like any other object, and manipulated the very same way.
Just like with Paths, you probably won't be working with them directly. But if you stumble upon one after parsing SVG document, you'll know exactly what it is and which purpose it serves.
Afterword
We've only scratched the surface of what's possible with Fabric. You can now easily create any of the simple shapes, complex shapes, images; add them to canvas, and modify in any way you want — positions, dimensions, angles, colors, strokes, opacity — you name it.
In the next parts of this series, we'll take a look at working with groups; animation; text; SVG parsing, rendering, serialization; events; image filters; and more.
Meanwhile, feel free to take at look at the annotated demos or benchmarks, join the discussion in google group or elsewhere, or go straight for the docs, wiki, and source.
Have fun experimenting with Fabric! I hope you enjoy the ride.
Read Part 2.