Introduction to Fabric.js. Part 2.
In the first part of this series, we only started to get familiar with Fabric.js. We looked at the reasons to use Fabric, at its object model and object hierarchy, at different kind of entities available in Fabric — simple shapes, images, and complex paths. We also learned how to perform simple operations with Fabric objects on canvas.
Now that most of the basics are out of the way, let's get down to some fun stuff!
Animation
No respectable canvas library goes without animation facility. And Fabric is not an exception. Since there's such a powerful object model and graphical capabilities, it would be a shame not to have animation helpers built in.
Remember how easy it was to change property of any object? We just called set method, passing corresponding value(s):
rect.set('angle', 45);
Well, animating an object is just as easy. Every Fabric object has animate method which... animates that object.
rect.animate('angle', 45, {
  onChange: canvas.renderAll.bind(canvas)
});
First argument is the property to animate. Second argument is the ending value of animation. If rectangle has -15° angle, and we pass 45, it will be animated from -15° to 45°. The third argument is an optional object specifying finer details of animation — duration, callbacks, easing, etc.
One convenient feature of animate is that it also supports relative values. For example, if you wanted to animate object's left property by 100px, you could do it like this:
rect.animate('left', '+=100', { onChange: canvas.renderAll.bind(canvas) });
Similarly, rotating object by 5 degrees counter-clockwise, can be accomplished like so:
rect.animate('angle', '-=5', { onChange: canvas.renderAll.bind(canvas) });
You might be wondering why we always specify "onChange" callback there. Isn't third argument optional? It is, but calling canvas.renderAll on each animation frame is what allows us to see actual animation! You see, when we call animate method, it only animates property value over time, following specific algorithm (i.e. easing). So rect.animate('angle', 45) will change object's angle but won't re-render canvas screen after each change of the angle. And we obviously need this re-rendering in order to see the actual animation.
Remember that there's entire object model underneath that canvas surface. Objects have their own properties and relations, and canvas is only responsible for projecting their existence to the outside world.
The reason animate doesn't automatically re-render canvas after each change is due to performance. After all, we can have hundreds or thousands animating objects on canvas, and it wouldn't be good if every one of them tried to re-render screen. In the case of many objects, you could use something like requestAnimationFrame (or other timer-based) loop to render canvas continuosly on its own, without calling renderAll for each object. But most of the time, you'll probably need to explicitly specify canvas.renderAll as "onChange" callback.
So which other options can we pass to animate?
- from: Allows to specify starting value of animatable property (if we don't want current value to be used).
- duration: Defaults to 500 (ms). Can be used to change duration of an animation.
- onComplete: Callback that's invoked at the end of the animation.
- easing: Easing function.
All of these options should be self-explanatory, except perhaps easing one. Let's take a closer look.
By default, animate uses "easeInSine" function for animation. If that's not what you need, there's a whole slew of easing options available under fabric.util.ease. For example, if we wanted to move object to the right in a bouncy fashion:
rect.animate('left', 500, {
  onChange: canvas.renderAll.bind(canvas),
  duration: 1000,
  easing: fabric.util.ease.easeOutBounce
});
Notice fabric.util.ease.easeOutBounce as an easing option. Other notable ones include easeInCubic, easeOutCubic, easeInElastic, easeOutElastic, easeInBounce, and easeOutExpo.
So this almost covers the animation part of Fabric. Just to give you some ideas of what becomes possible — you can animate object's angle to make it rotate; animate left/top properties to make it move; animate width/height to make it shrink/grow; animate opacity to make it fade in/out; and so on.
fabric.runningAnimations
If you need to access the animations that are currently running by fabric, use fabric.runningAnimations. It's an array of objects, each an animation context object.
Handy methods:
fabric.runningAnimations.findAnimation(signature)- returns the animation context matchingsignaturewhich is the abort function returned byfabric.util.animate.fabric.runningAnimations.findAnimationIndex(signature)- same asfindAnimation, returns the index.fabric.runningAnimations.findAnimationsByTarget(target)- returns all animations that have atargetproperty that is equal to target.fabric.runningAnimations.cancelAll()- cancels all running animations.fabric.runningAnimations.cancelByTarget(target)- cancels animations that have atargetproperty that is equal to target.object.dispose()- all animations created by the object (object.animate(...)) are cancelled. If you want to add animations usingfabric.util.animateinstead ofobject.animate(...)you can attach them to an object by passing thetargetproperty. This way the animations will cancel once the object is disposed.
  let cancel = fabric.util.animate({...});
  let i = fabric.runningAnimations.findAnimationIndex(cancel);
  let context = fabric.runningAnimations.findAnimation(cancel);
  let cancelled = fabric.runningAnimations.cancelAll();

  //  the following statements are true
  cancelled[i] === context;
  cancelled[i].cancel === cancel;
  fabric.runningAnimations.length === 0;
Image filters
In the first part of this series, we learned how to work with images in Fabric. There's fabric.Image constructor, that accepts image element. There's also fabric.Image.fromURL method, which can create image instance ouf of a URL string. And any of these images can be thrown and rendered on canvas just like any other object.
But as fun working with images as it is, it's even cooler to apply image filters to them!
Fabric provides few filters by default, both for WEBGL enabled browsers and not. It also makes it easy to define your own. Some of the built-in ones you might be very well familiar with — filter to remove white background, grayscale filter, invert or brightness ones. Others might be a little less popular — colormatrix, sepia, or noise.
So how do we apply filters to images in Fabric? Well, every instance of fabric.Image has "filters" property which is a simple array of filters. Each of the filters in that array is an instance of one of Fabric filters. Or an instance of your own custom filter.
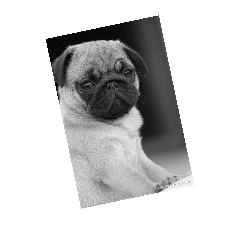
So let's create a grayscale image.
fabric.Image.fromURL('pug.jpg', function(img) {

  // add filter
  img.filters.push(new fabric.Image.filters.Grayscale());

  // apply filters and re-render canvas when done
  img.applyFilters();
  // add image onto canvas (it also re-render the canvas)
  canvas.add(img);
});
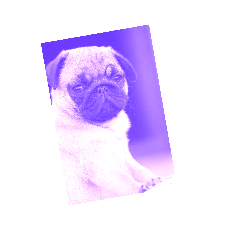
How about a sepia version of an image?
fabric.Image.fromURL('pug.jpg', function(img) {
  img.filters.push(new fabric.Image.filters.Sepia());
  img.applyFilters();
  // add image onto canvas (it also re-render the canvas)
  canvas.add(img);
});
Since "filters" property is a simple array, we can perform any desired operations with it in a usual way — remove filter (via pop, splice, or shift), add filter (via push, splice, unshift), or even combine multiple filters. Any filters present in "filters" array will be applied one by one, when we call applyFilters. So let's try to create an image that's both sepia and bright.
fabric.Image.fromURL('pug.jpg', function(img) {
  img.filters.push(
    new fabric.Image.filters.Sepia(),
    new fabric.Image.filters.Brightness({ brightness: 100 }));

  img.applyFilters();
  canvas.add(img);
});
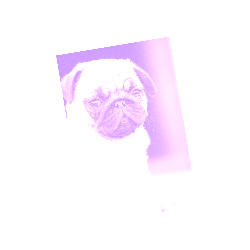
Notice that we also passed { brightness: 100 } object to Brightness filter. That's because some filters can be applied without any additional configuration (e.g. grayscale, invert, sepia) and others provide finer control for their behavior. For brightness filter, it's the actual brightness level (-1 full black to 1 full white). For noise filter, it's the noise value (0-1000). For "remove color" filter, it's the threshold and distance values. And so on.
So now that you became familiar with Fabric filters, it's time to break out of the box and create your own filter!
The template for creating a filter is pretty straightforward. We'll need to create a "class", then define applyTo method. Optionally, we might give filter toJSON method (support for JSON serialization), and/or initialize method (support for optional parameters).
fabric.Image.filters.Redify = fabric.util.createClass(fabric.Image.filters.BaseFilter, {

  type: 'Redify',

  /**
   * Fragment source for the redify program
   */
  fragmentSource: 'precision highp float;\n' +
    'uniform sampler2D uTexture;\n' +
    'varying vec2 vTexCoord;\n' +
    'void main() {\n' +
      'vec4 color = texture2D(uTexture, vTexCoord);\n' +
      'color.g = 0.0;\n' +
      'color.b = 0.0;\n' +
      'gl_FragColor = color;\n' +
    '}',

  applyTo2d: function(options) {
    var imageData = options.imageData,
        data = imageData.data, i, len = data.length;

    for (i = 0; i < len; i += 4) {
      data[i + 1] = 0;
      data[i + 2] = 0;
    }

  }
});

fabric.Image.filters.Redify.fromObject = fabric.Image.filters.BaseFilter.fromObject;

Without delving too much into this code, the main action is happening in a loop. where we replace green (data[i+1]) and blue (data[i+2]) components of each pixel with 0, essentially removing them. Red component of standard rgb triple stays untouched, essentially making entire image painted red. As you can see, applyTo method is being passed an option object that contains the imageData of the image at that stage of the filtering pipeline. From there, we can iterate over its pixels (getImageData().data) modifying them in any way we want. If the browsers is WEBGL enabled filters can run on the GPU. To do so you have to provide a fragment shader that describes the operation to do over pixels. There are many filter defined in fabric where you can see example of how to write a fragment or vertex shader
Colors
Whether you're more comfortable working with hex, RGB, or RGBA colors, Fabric provides a solid color foundation to help you express yourself most naturally. Here are some of the ways in which you can define a color in Fabric:
new fabric.Color('#f55');
new fabric.Color('#123123');
new fabric.Color('356735');
new fabric.Color('rgb(100,0,100)');
new fabric.Color('rgba(10, 20, 30, 0.5)');
Conversion is straightforward as well. toHex() will convert color instance to hex representation. toRgb() — to RGB one, and toRgba() — to RGB with alpha channel.
new fabric.Color('#f55').toRgb(); // "rgb(255,85,85)"
new fabric.Color('rgb(100,100,100)').toHex(); // "646464"
new fabric.Color('fff').toHex(); // "FFFFFF"
Conversion is not the only thing you can do with colors. You can also overlay one color with another, or turn it to grayscale version.
var redish = new fabric.Color('#f55');
var greenish = new fabric.Color('#5f5');

redish.overlayWith(greenish).toHex(); // "AAAA55"
redish.toGrayscale().toHex(); // "A1A1A1"
Gradients
An even more expressive way to work with colors is via gradients. Gradients allow us to blend one color into another, creating some stunning graphical effects.
Fabric supports gradients setting the fill or stroke property on all objects. In order to set a gradient to an object, first create the gradient and then assign it to fill or stroke.
var circle = new fabric.Circle({
  left: 100,
  top: 100,
  radius: 50
});

var gradient = new fabric.Gradient({
  type: 'linear',
  gradientUnits: 'pixels', // or 'percentage'
  coords: { x1: 0, y1: 0, x2: 0, y2: circle.height },
  colorStops:[
    { offset: 0, color: '#000' },
    { offset: 1, color: '#fff'}
  ]
})

circle.set('fill', gradient);
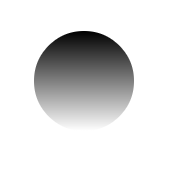
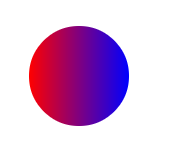
In the above example, we create a circle at 100,100 location, with 50px radius. We then set its fill to a gradient that spans throughout entire height of that circle, from black to white.
Gradient option object has 2 main properties, coords and colorStops. coords expect at least 2 coordinates
pairs (x1, y1 and x2, y2) that will define how the gradient extend on the object, while colorStops is an array
that defines the gradients colors. Each color in the array is defined by an offset that represents its position
on the gradient, a color that defines the color itself and eventually an opacity property.
You can define as many color stops as you want, as long as theyr offset range from `0` to `1`. `0` represents beginning of a gradient, `1` its end.
Coordinates are relative to object top left corner, so the highest point of the circle is 0, and the lowest point is circle.height.
You can specify type linear or radial to obtain 2 different kind of gradients, and also
gradientUnits defaults to pixels but can be specified as `percentage`. `percentage` will allow the gradient
size to be specified in percentage of object size, with `1` being 100% of object size.
This setting is useful for fabric.Text objects that change the width or height depending on text content.
Here's an example of left-to-right red-blue gradient:
  var gradient = new fabric.Gradient({
    type: 'linear',
    gradientUnits: 'pixels', // or 'percentage'
    coords: { x1: 0, y1: 0, x2: circle.width, y2: 0 },
    colorStops:[
      { offset: 0, color: 'red' },
      { offset: 1, color: 'blue'}
    ]
  })
 // or in percentage
  var gradient = new fabric.Gradient({
    type: 'linear',
    gradientUnits: 'percentage',
    coords: { x1: 0, y1: 0, x2: 1, y2: 0 },
    colorStops:[
      { offset: 0, color: 'red' },
      { offset: 1, color: 'blue'}
    ]
  })
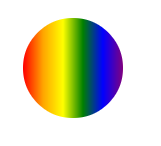
And here's a 5-stops rainbow gradient, with colors spanning at even 20% intervals:
var gradient = new fabric.Gradient({
  type: 'linear',
  gradientUnits: 'pixels', // or 'percentage'
  coords: { x1: 0, y1: 0, x2: circle.width, y2: 0 },
  colorStops:[
    { offset: 0, color: 'red' },
    { offset: 0.2, color: 'orange' },
    { offset: 0.4, color: 'yellow' },
    { offset: 0.6, color: 'green' },
    { offset: 0.8, color: 'blue' },
    { offset: 1, color: 'purple' }
  ]
});
Text
What if you wanted to display not only images and vector shapes on canvas, but also text? Fabric has you covered! Meet fabric.Text objects.
There are 2 reasons we're providing text abstraction in Fabric. First, is to allow working with text in an object oriented fashion. Native canvas methods — as usual — only allow to fill or stroke text on a very low level. By instantiating fabric.Text instances, we can work with text just like we would work with any other Fabric object — move it, scale it, change its properties, and so on.
Second reason is to provide a much richer functionality than what canvas gives us. Some of the Fabric additions include:
- Multiline support Native text methods unfortunately simply ignore new lines.
- Text alignment Left, center, right. Useful when working with multiline text.
- Text background Background also respects text alignment.
- Text decoration Underline, overline, strike-through.
- Line height Useful when working with multiline text.
- Char spacing Makes text more compact or more spaced
- Subranges apply colors and properties to subranges of your text object
- Multibyte support emoticons!
- On canvas editing with the interactive class you can type text directly over the canvas
How about hello world example?
var text = new fabric.Text('hello world', { left: 100, top: 100 });
canvas.add(text);
That's right! Displaying text on canvas is as simple as adding fabric.Text instance at a desired location. As you can see, the only required first parameter is actual text string. Second argument is the usual options object, which can have any of the usual left, top, fill, opacity, etc. properties.
But of course text objects also have their own, unique, text-related properties. Let's look at some of them:
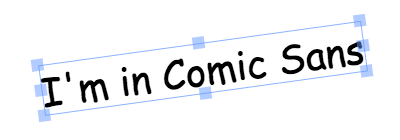
fontFamily
Set as "Times New Roman" by default, this property allow us to change font family used to render a text object. Changing it will immediately make text rendered in a new font.
var comicSansText = new fabric.Text("I'm in Comic Sans", {
  fontFamily: 'Comic Sans'
});
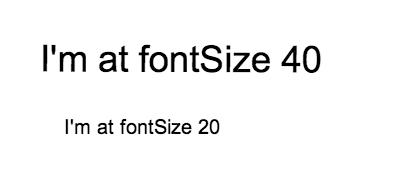
fontSize
Font size controls the size of rendered text. Note that unlike with other objects in Fabric, you can't change text's width/height properties directly. Instead, you'll need to change "fontSize" value in order to make text objects larger or smaller. Either that, or you can always use scaleX/scaleY properties.
var text40 = new fabric.Text("I'm at fontSize 40", {
  fontSize: 40
});
var text20 = new fabric.Text("I'm at fontSize 20", {
  fontSize: 20
});
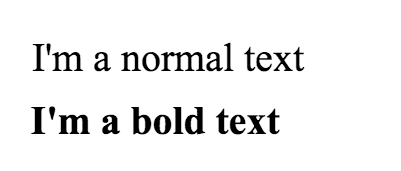
fontWeight
Font weight allows to make text thicker or thinner -looking. Just like in CSS, you can use either keywords ("normal", "bold") or numbers (100, 200, 400, 600, 800). Note that whether you can use certain weight depends on availability of that weight for a chosen font. If you're using remote font, you'll need to make sure you provide both normal and bold (as well as any other required weight) font definitions.
var normalText = new fabric.Text("I'm a normal text", {
  fontWeight: 'normal'
});
var boldText = new fabric.Text("I'm at bold text", {
  fontWeight: 'bold'
});
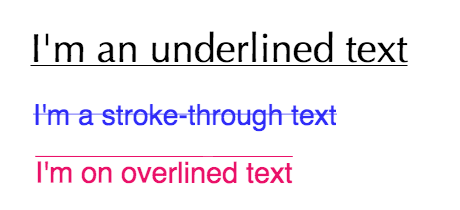
textDecoration
Text decoration allows to add undeline, overline, or strike-through to a text. This is similar to CSS, but Fabric goes a little further and allows to use any combination of the above together. So you can have a text that's both underline and overline, or underline and strike-through, and so on.
var underlineText = new fabric.Text("I'm an underlined text", {
  underline; true
});
var strokeThroughText = new fabric.Text("I'm a stroke-through text", {
  linethrough: true
});
var overlineText = new fabric.Text("I'm an overline text", {
  overline: true
});
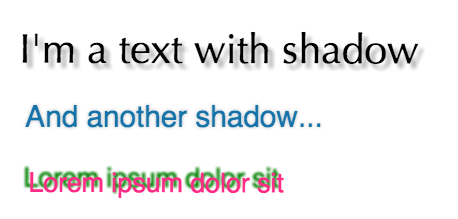
shadow
This property was called "textShadow" before version 1.3.0
Text shadow consists of 4 components: color, horizontal offset, vertical offset, and blur size. This might look very familiar if you've worked with shadows in CSS. Lots of combinations possible by changing these values.
var shadowText1 = new fabric.Text("I'm a text with shadow", {
  shadow: 'rgba(0,0,0,0.3) 5px 5px 5px'
});
var shadowText2 = new fabric.Text("And another shadow", {
  shadow: 'rgba(0,0,0,0.2) 0 0 5px'
});
var shadowText3 = new fabric.Text("Lorem ipsum dolor sit", {
  shadow: 'green -5px -5px 3px'
});
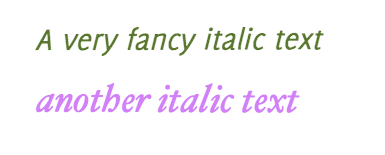
fontStyle
Font style can be one of 2 values: normal or italic. This is similar to same-named CSS property.
var italicText = new fabric.Text("A very fancy italic text", {
  fontStyle: 'italic',
  fontFamily: 'Delicious'
});
var anotherItalicText = new fabric.Text("another italic text", {
  fontStyle: 'italic',
  fontFamily: 'Hoefler Text'
});
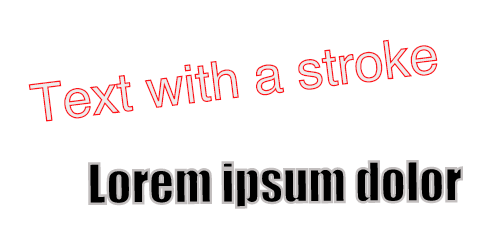
stroke and strokeWidth
By combining stroke (color of the stroke) and strokeWidth (its width), you can achieve some interesting effects on your text. Here's a couple of examples:
var textWithStroke = new fabric.Text("Text with a stroke", {
  stroke: '#ff1318',
  strokeWidth: 1
});
var loremIpsumDolor = new fabric.Text("Lorem ipsum dolor", {
  fontFamily: 'Impact',
  stroke: '#c3bfbf',
  strokeWidth: 3
});
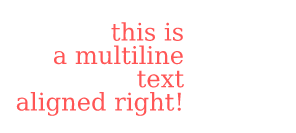
textAlign
Text align comes useful when working with multiline text. With one-line text, the width of bounding box is always exactly matching that line's width, so there's nothing to align.
Allowed values are "left", "center", and "right".
var text = 'this is\na multiline\ntext\naligned right!';
var alignedRightText = new fabric.Text(text, {
  textAlign: 'right'
});
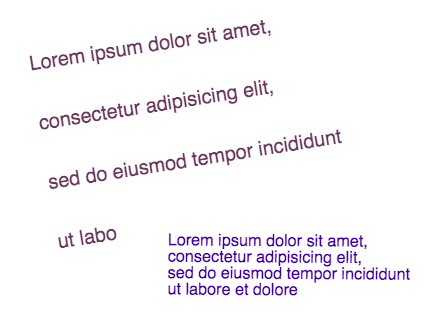
lineHeight
Another property that might be familiar from CSS-land is lineHeight. It allows us to change vertical spacing between text lines in multiline text. In the following example, first chunk of text has lineHeight of 3, and second one — 1.
var lineHeight3 = new fabric.Text('Lorem ipsum ...', {
  lineHeight: 3
});
var lineHeight1 = new fabric.Text('Lorem ipsum ...', {
  lineHeight: 1
});
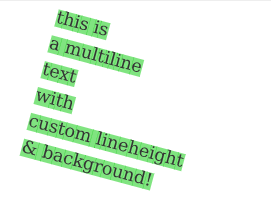
textBackgroundColor
Finally, textBackgroundColor is what allows to give text a background. Note that background fills only space occupied by text characters, not the entire bounding box. It means that text alignment changes the way text background is rendered. So does line height, since background respects this vertical space between lines, created by lineHeight.
var text = 'this is\na multiline\ntext\nwith\ncustom lineheight\n&background';
var textWithBackground = new fabric.Text(text, {
  textBackgroundColor: 'rgb(0,200,0)'
});
Events
The event-driven architecture is the basis for some amazing power and flexibility within a framework. Fabric is no exception, and provides an extensive event system, starting from low-level "mouse" events to high-level objects ones.
These events allow us to tap into different moments of various actions happening on canvas. Want to know when the mouse was pressed? Just observe "mouse:down" event. How about when object was added to canvas? "object:added" is there for you. And what about when the entire canvas is re-rendered? Just use "after:render".
The event API is very simple and resembles that of jQuery, Underscore.js, or other popular JS libraries. There's on method to initialize event listener, and off to remove it.
Let's take a look at an actual example:
var canvas = new fabric.Canvas('...');
canvas.on('mouse:down', function(options) {
  console.log(options.e.clientX, options.e.clientY);
});
We're adding event "mouse:down" event listener onto canvas, and giving it an event handler that will log coordinates of where the event originated. In other words, it'll log where exactly on canvas the mouse was pressed. The event handler receives an options object, which has 2 properties: e — the original event, and target — a clicked object on canvas, if any. The event is present at all times, but target only exists if you actually did click on some object on canvas. The target is also only passed to handlers of events where it makes sense. For example, for "mouse:down" but not for "after:render" (which denotes that entire canvas was re-drawn).
canvas.on('mouse:down', function(options) {
  if (options.target) {
    console.log('an object was clicked! ', options.target.type);
  }
});
The above example will log "an object was clicked!" if you click an object. It will also show the type of object clicked.
So which other events are available in Fabric? Well, from mouse-level ones there are "mouse:down", "mouse:move", and "mouse:up". From generic ones, there are "after:render". Then there are selection-related events: "before:selection:cleared", "selection:created", "selection:cleared". And finally, object ones: "object:modified", "object:selected", "object:moving", "object:scaling", "object:rotating", "object:added", and "object:removed"
Note that events like "object:moving" (or "object:scaling") are fired continuously every time an object is moved (or scaled) even by one pixel. On the other hand, events like "object:modified" or "selection:created" are fired only at the end of the action (object modification or selection creation).
Note how we attached events right onto canvas (canvas.on('mouse:down', ...)). As you can imagine, this means that events are all scoped to canvas instances. If you have multiple canvases on a page, you can attach different event listeners to each one of them. They're all independent and respect only events that were assigned to them.
For convenience, Fabric takes event system even further, and allows you to attach listeners directly to canvas objects. Let's take a look:
var rect = new fabric.Rect({ width: 100, height: 50, fill: 'green' });
rect.on('selected', function() {
  console.log('selected a rectangle');
});

var circle = new fabric.Circle({ radius: 75, fill: 'blue' });
circle.on('selected', function() {
  console.log('selected a circle');
});
We're attaching event listeners directly to rectangle and circle instances. Instead of "object:selected", we're using "selected" event. Similarly, we could have used "modified" event ("object:modified" when attaching to canvas), "rotating" event ("object:rotating" when attaching to canvas), and so on.
Check this events demo for a more extensive exploration of Fabric's event system.
Read Part 3.