Introduction to Fabric.js. Part 3.
We've covered most of the basics in first and second parts of this series. Let's move on to the more advanced stuf!
Groups
First thing we'll talk about is groups. Groups are one of Fabric's most powerful features. They are exactly what they sound like — a simple way to group any Fabric objects into a single entity. Why would we want to do this? To be able to work with those objects as a single unit, of course!
Remember how any number of Fabric objects on canvas can be grouped with the mouse, forming a single selection? Once grouped, the objects can all be moved and even modified together. They form a group. We can scale that group, rotate, and even change its presentational properties — color, transparency, borders, etc.
This is exactly what groups are for, and every time you see a selection like this on canvas, Fabric creates a group of objects implicitly, behind the scenes. It only makes sense to provide access to working with groups programmatically. This is what fabric.Group is for.
Let's create a group of 2 objects, circle and text:
var circle = new fabric.Circle({
  radius: 100,
  fill: '#eef',
  scaleY: 0.5,
  originX: 'center',
  originY: 'center'
});

var text = new fabric.Text('hello world', {
  fontSize: 30,
  originX: 'center',
  originY: 'center'
});

var group = new fabric.Group([ circle, text ], {
  left: 150,
  top: 100,
  angle: -10
});

canvas.add(group);
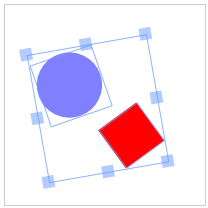
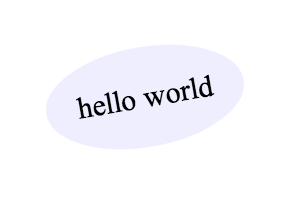
First, we created a "hello world" text object. Setting originX and originY to 'center' will cause it to be centered within the group; by default group members are oriented relative to the top-left corner of the group. Then, circle with 100px radius, filled with "#eef" color and squeezed vertically (scaleY=0.5). We then created a fabric.Group instance, passing it array with these two objects, and giving it position of 150/100 and a -10 angle. Finally, the group was added to canvas as any other object would be (with canvas.add()).
And voila! You see an object on canvas, that looks like a labeled ellipse. Notice how in order to modify that object, we simply changed properties of a group, giving it custom left, top and angle values. You can now work with this object as a single entity.
Now that we have a group on canvas, let's change it up a little:
// in order to use setFill named setter, you need to add the optional named setter/getter
// code from src/util/named_accessors.mixins.js
group.item(0).set('fill', 'red');
group.item(1).set({
  text: 'trololo',
  fill: 'white'
});
What's going on here? We're accessing individual objects in a group via item() method, and modifying their properties. First object is the squeezed circle, second one is the text. Let's see what happens:
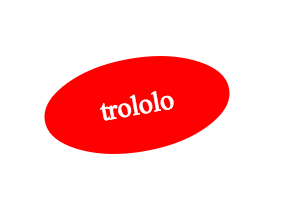
One important thing you've probably noticed by now is that objects in group are all positioned relative to the center of a group. When we changed text of text object, it stayed centered even after changing its width. If you don't want this behavior, you need to specify objects' left/top coordinates. In that case, they will be grouped together according to those coordinates.
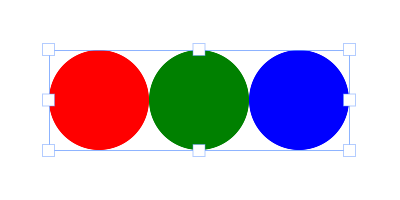
Let's create and group 3 circles so they're positioned horizontally one after each other:
var circle1 = new fabric.Circle({
  radius: 50,
  fill: 'red',
  left: 0
});
var circle2 = new fabric.Circle({
  radius: 50,
  fill: 'green',
  left: 100
});
var circle3 = new fabric.Circle({
  radius: 50,
  fill: 'blue',
  left: 200
});

var group = new fabric.Group([ circle1, circle2, circle3 ], {
  left: 200,
  top: 100
});

canvas.add(group);
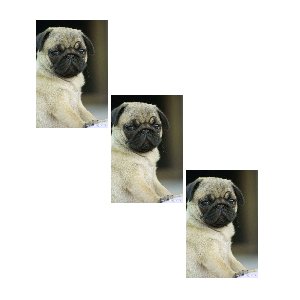
Another thing to keep in mind when working with groups is the state of objects. For example, when forming a group with images, you need to make sure those images are fully loaded. Since Fabric already provides helper methods for ensuring that image is loaded, this becomes fairly easy:
fabric.Image.fromURL('/assets/pug.jpg', function(img) {
  var img1 = img.scale(0.1).set({ left: 100, top: 100 });

  fabric.Image.fromURL('/assets/pug.jpg', function(img) {
    var img2 = img.scale(0.1).set({ left: 175, top: 175 });

    fabric.Image.fromURL('/assets/pug.jpg', function(img) {
      var img3 = img.scale(0.1).set({ left: 250, top: 250 });

      canvas.add(new fabric.Group([ img1, img2, img3], { left: 200, top: 200 }))
    });
  });
});
So which other methods are available when working with groups? There's getObjects() method, which works exactly the same as fabric.Canvas#getObjects() and returns an array of all objects in a group. There's size() which represents the number of all objects in a group. There's contains() which allows to check if a particular object is in a group. There's item(), which we saw earlier, allowing to retrieve specific object in a group. There's forEachObject(), once again mirroring fabric.Canvas#forEachObject, only in relation to group objects. Finally there's add() and remove() method to add and remove objects from the group accordingly.
You can add/remove objects from group in 2 ways — with update of group dimensions/position and without. We suggest to use the update dimensions, unless you are doing a batch operation and you have no problem with the group having wrong width/height during the process
To add rectangle at the center of a group:
group.add(new fabric.Rect({
  ...
  originX: 'center',
  originY: 'center'
}));
To add rectangle 100px off the center of the group:
group.add(new fabric.Rect({
  ...
  left: 100,
  top: 100,
  originX: 'center',
  originY: 'center'
}));
To add rectangle at the center of a group AND update group's dimensions:
group.addWithUpdate(new fabric.Rect({
  ...
  left: group.get('left'),
  top: group.get('top'),
  originX: 'center',
  originY: 'center'
}));
To add rectangle at 100px off the center of a group AND update group's dimensions:
group.addWithUpdate(new fabric.Rect({
  ...
  left: group.get('left') + 100,
  top: group.get('top') + 100,
  originX: 'center',
  originY: 'center'
}));
Finally, if you'd like to create a group with objects that are already present on canvas, you'll need to clone them first:
// create a group with copies of existing (2) objects
var group = new fabric.Group([
  canvas.item(0).clone(),
  canvas.item(1).clone()
]);

// remove all objects and re-render
canvas.clear().renderAll();

// add group onto canvas
canvas.add(group);
Serialization
As soon as you start building a stateful application of some sort, perhaps allowing users to save results of canvas contents on a server, or streaming contents to a different client, you'll need canvas serialization. How else are you to send canvas contents? Of course, there's always an option to export canvas to an image, but uploading an image to a server is certainly quite bandwidth-heavy. Nothing beats text when it comes to size, and that's exactly why Fabric provides an excellent support for canvas serialization/deserialization.
toObject, toJSON
The backbone of canvas serialization in Fabric is fabric.Canvas#toObject() and fabric.Canvas#toJSON() methods. Let's take a look at a simple example, first serializing an empty canvas:
var canvas = new fabric.Canvas('c');
JSON.stringify(canvas); // '{"objects":[],"background":"rgba(0, 0, 0, 0)"}'
We're using ES5 JSON.stringify() method, which implicitly calls toJSON method on passed object, if that method exists. Since canvas instance in Fabric has toJSON method, it's as if we called JSON.stringify(canvas.toJSON()) instead.
Notice the returned string that represents empty canvas. It's in JSON format, and essentially consists of "objects" and "background" properties. "objects" is currently empty, since there's nothing on canvas, and background has a default transparent value ("rgba(0, 0, 0, 0)").
Let's give canvas different background and see how things change:
canvas.backgroundColor = 'red';
JSON.stringify(canvas); // '{"objects":[],"background":"red"}'
As one would expect, canvas representation now reflects new background color. Now, let's add some objects!
canvas.add(new fabric.Rect({
  left: 50,
  top: 50,
  height: 20,
  width: 20,
  fill: 'green'
}));
console.log(JSON.stringify(canvas));
..and the logged output is:
'{"objects":[{"type":"rect","left":50,"top":50,"width":20,"height":20,"fill":"green","overlayFill":null,"stroke":null,"strokeWidth":1,"strokeDashArray":null,"scaleX":1,"scaleY":1,"angle":0,"flipX":false,"flipY":false,"opacity":1,"selectable":true,"hasControls":true,"hasBorders":true,"hasRotatingPoint":false,"transparentCorners":true,"perPixelTargetFind":false,"rx":0,"ry":0}],"background":"rgba(0, 0, 0, 0)"}'
Woah. At first sight quite a lot changed, but looking closer we see that it's newly-added object that's now part of "objects" array, serialized into JSON. Notice, how its representation includes all of its visual traits — left, top, width, height, fill, stroke, and so on.
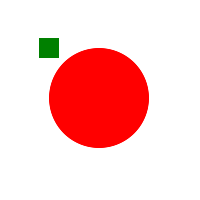
If we were to add another object — say, a red circle positioned next to the rectangle, you would see that representation changed accordingly:
canvas.add(new fabric.Circle({
  left: 100,
  top: 100,
  radius: 50,
  fill: 'red'
}));
console.log(JSON.stringify(canvas));
..and the logged output is:
'{"objects":[{"type":"rect","left":50,"top":50,"width":20,"height":20,"fill":"green","overlayFill":null,"stroke":null,"strokeWidth":1,"strokeDashArray":null,"scaleX":1,"scaleY":1,"angle":0,"flipX":false,"flipY":false,"opacity":1,"selectable":true,"hasControls":true,"hasBorders":true,"hasRotatingPoint":false,"transparentCorners":true,"perPixelTargetFind":false,"rx":0,"ry":0},{"type":"circle","left":100,"top":100,"width":100,"height":100,"fill":"red","overlayFill":null,"stroke":null,"strokeWidth":1,"strokeDashArray":null,"scaleX":1,"scaleY":1,"angle":0,"flipX":false,"flipY":false,"opacity":1,"selectable":true,"hasControls":true,"hasBorders":true,"hasRotatingPoint":false,"transparentCorners":true,"perPixelTargetFind":false,"radius":50}],"background":"rgba(0, 0, 0, 0)"}'
I highlighted the "type":"rect" and "type":"circle" parts, so that you can see better where those objects are. Even though it might seem like a lot of output at first, it is nothing comparing to what you would get with image serialization. Just for comparison, let's take a look at about 1/10th (!) of a string you would get with canvas.toDataURL('png')
data:image/png;base64,iVBORw0KGgoAAAANSUhEUgAAAyAAAAK8CAYAAAAXo9vkAAAgAElEQVR4Xu3dP4xtBbnG4WPAQOQ2YBCLK1qpoQE1/m+NVlCDwUACicRCEuysrOwkwcJgAglEItRQaWz9HxEaolSKtxCJ0FwMRIj32zqFcjm8e868s2fNWo/Jygl+e397rWetk5xf5pyZd13wPwIECBAgQIAAAQIECBxI4F0H+hwfQ4AAAQIECBAgQIAAgQsCxENAgAABAgQIECBAgMDBBATIwah9EAECBAgQIECAAAECAsQzQIAAAQIECBAgQIDAwQQEyMGofRABAgQIECBAgAABAgLEM0CAAAECBAgQIECAwMEEBMjBqH0QAQIECBAgQIAAAQICxDNAgAABAgQIECBAgMDBBATIwah9EAECBAgQIECAAAECAsQzQIAAAQIECBAgQIDAwQQEyMGofRABAgQIECBAgAABAgLEM0CAAAECBAgQIECAwMEEBMjBqH0QAQIECBAgQIAAAQICxDNAgAABAgQIECBAgMDBBATIwah9EAECBAgQIECAAAECAsQzQIAAAQIECBAgQIDAwQQEyMGofRABAgQIECBAgAABAgLEM0CAAAECBAgQIECAwMEEBMjBqH0QAQIECBAgQIAAAQICxDNAgAABAgQIECBAgMDBBATIwah9EAECBAgQIECAAAECAsQzQIAAAQIECBAgQIDAwQQEyMGofRABAgQIECBAgAABAgLEM0CAAAECBAgQIECAwMEEBMjBqH0QAQIECBAgQIAAAQICxDNAgAABAgQIECBAgMDBBATIwah9EAECBAgQIECAAAECAsQzQIAAAQIECBAgQIDAwQQEyMGofRABAgQIECBAgAABAgLEM0CAAAECBAgQIECAwMEEBMjBqH0QAQIECBAgQIAAAQICxDNAgAABAgQIECBAgMDBBATIwah9EAECBAgQIECAAAECAsQzQIAAAQIECBAgQIDAwQQEyMGofRABAgQIECBAgAABAgLEM0CAAAECBAgQIECAwMEEBMjBqH0QAQIECBAgQIAAAQICxDNAgAABAgQIECBAgMDBBATIwah9EAECBAgQIECAAAECyw+Qb134R/U2fevC8q+5esGWESBAgAABAgQIEFiOwPL/MC5AlvO0OBMCBAgQIECAAAECJxQQICcE9HYCBAgQIECAAAECBPYXECD7W3klAQIECBAgQIAAAQInFBAgJwT0dgIECBAgQIAAAQIE9hcQIPtbeSUBAgQIECBAgAABAicUECAnBPR2AgQIECBAgAABAgT2FxAg+1t5JQECBAgQIECAAAECJxQQICcE9HYCBAgQIECAAAECBPYXECD7W3klAQIECBAgQIAAAQInFBAgJwTc9+3z49yvmNd+dI7PzPHJOW6Y4wNzXD3HlXNc9pZdb85/vzbHK3P8aY7n5vj1HL+Y43dz417f97O9jgABAgQIECBAgMBSBATIKd2JCY5dWNwyx5fn+PwcV5U/6tXZ99M5fjjHk3Mjd6HifwQIECBAgAABAgQWLSBAirdnouP6WXfvHHfOcU1x9T6rXp4XPTLHA3NTX9jnDV5DgAABAgQIECBA4NACAuSE4hMdl8+Kr83xzTmuO+G61ttfnEXfnuN7c4PfaC21hwABAgQIECBAgMBJBQTIJQpOeFw7b71/jtsvccWh3vbYfNB9c6NfOtQH+hwCBAgQIECAAAECFxMQIMd8No7C4+F5283HfOtZv/ypOYG7hMhZ3wafT4AAAQIECBDYtoAA2fP+H/1Vqwd3f4jf8y1Lfdkunu7xV7OWenucFwECBAgQIEBg3QICZI/7O/Fxx7xs9wf3t36r3D3evciX7L7F7+6rIY8u8uycFAECBAgQIE
...and ~17000 characters more.
You might be wondering why there's also fabric.Canvas#toObject. Quite simply, toObject returns the same representation as toJSON, only in a form of actual object, without string serialization. For example, taking earlier example of canvas with just a green rectangle, `canvas.toObject()`'s output is this:
{ "background" : "rgba(0, 0, 0, 0)",
  "objects" : [
    {
      "angle" : 0,
      "fill" : "green",
      "flipX" : false,
      "flipY" : false,
      "hasBorders" : true,
      "hasControls" : true,
      "hasRotatingPoint" : false,
      "height" : 20,
      "left" : 50,
      "opacity" : 1,
      "overlayFill" : null,
      "perPixelTargetFind" : false,
      "scaleX" : 1,
      "scaleY" : 1,
      "selectable" : true,
      "stroke" : null,
      "strokeDashArray" : null,
      "strokeWidth" : 1,
      "top" : 50,
      "transparentCorners" : true,
      "type" : "rect",
      "width" : 20
    }
  ]
}
As you can see, toJSON output is essentially a stringified toObject output. Now, the interesting (and useful!) thing is that toObject output is smart and lazy. What you see inside "objects" array is the result of iterating over all canvas objects and delegating to their own toObject method. fabric.Path has its own toObject — that knows to return path's "points" array, and fabric.Image has its own toObject — that knows to return image's "src" property. In a true object-oriented fashion, all objects are capable of serializing themselves.
This means that when you create your own "class", or simply need to customize object's serialized representation, all you need to do is work with toObject method — either completely replacing it or extending it. Let's try this:
var rect = new fabric.Rect();
rect.toObject = function() {
  return { name: 'trololo' };
};
canvas.add(rect);
console.log(JSON.stringify(canvas));
..and the logged output is:
'{"objects":[{"name":"trololo"}],"background":"rgba(0, 0, 0, 0)"}'
As you can see, the objects array now has a custom representation of our rectangle. This kind of overwrite is probably not very useful — although brings the point across — so how about we instead extend rectangle's toObject method with additional property.
var rect = new fabric.Rect();

rect.toObject = (function(toObject) {
  return function() {
    return fabric.util.object.extend(toObject.call(this), {
      name: this.name
    });
  };
})(rect.toObject);

canvas.add(rect);

rect.name = 'trololo';

console.log(JSON.stringify(canvas));
..and the logged output is:
'{"objects":[{"type":"rect","left":0,"top":0,"width":0,"height":0,"fill":"rgb(0,0,0)","overlayFill":null,"stroke":null,"strokeWidth":1,"strokeDashArray":null,"scaleX":1,"scaleY":1,"angle":0,"flipX":false,"flipY":false,"opacity":1,"selectable":true,"hasControls":true,"hasBorders":true,"hasRotatingPoint":false,"transparentCorners":true,"perPixelTargetFind":false,"rx":0,"ry":0,"name":"trololo"}],"background":"rgba(0, 0, 0, 0)"}'
We extended object's existing toObject method with additional property — "name", so that property is now part of toObject output, and as a result appears in canvas JSON representation. One more thing worth mentioning is that if you extend objects like this, you'll also want to make sure object's "class" (fabric.Rect in this case) has this property in "stateProperties" array, so that loading canvas from string representation would parse and add it to an object correctly.
You can mark an object as non exportable setting excludeFromExport to true. In this way some helper objects you can have on canvas will not be saved during your serialization.
toSVG
Another efficient text-based canvas representation is in SVG format. Since Fabric specializes in SVG parsing and rendering on canvas, it only makes sense to make this a two-way process and provide canvas-to-SVG conversion. Let's add the same rectangle to canvas, and see what kind of representation is returned from toSVG method:
canvas.add(new fabric.Rect({
  left: 50,
  top: 50,
  height: 20,
  width: 20,
  fill: 'green'
}));
console.log(canvas.toSVG());
..and the logged output is:
'<?xml version="1.0" standalone="no" ?><!DOCTYPE svg PUBLIC "-//W3C//DTD SVG 20010904//EN" "http://www.w3.org/TR/2001/REC-SVG-20010904/DTD/svg10.dtd"><svg xmlns="http://www.w3.org/2000/svg" xmlns:xlink="http://www.w3.org/1999/xlink" version="1.1" width="800" height="700" xml:space="preserve"><desc>Created with Fabric.js 0.9.21</desc><rect x="-10" y="-10" rx="0" ry="0" width="20" height="20" style="stroke: none; stroke-width: 1; stroke-dasharray: ; fill: green; opacity: 1;" transform="translate(50 50)" /></svg>'
Just like with toJSON and toObject, toSVG — when called on canvas — delegates its logic to each individual object, and each individual object has its own toSVG method that is special to the type of object. If you ever need to modify or extend SVG representation of an object, you can do the same thing with toSVG as we've done with toObject.
The benefit of SVG representation comparing to Fabric's proprietary toObject/toJSON is that you can throw it into any SVG-capable renderer (browser, application, printer, camera, etc.) and it should just work. With toObject/toJSON, however, you would first need to load it onto canvas. Speaking of loading things on canvas, now that we can serialize canvas into an efficient chunk of text, how would we go about loading back onto canvas?
Deserialization, SVG parser
Similarly to serialization, there's two ways to load canvas from a string: from JSON representation, or from SVG one. When using JSON representation, there's fabric.Canvas#loadFromJSON and fabric.Canvas#loadFromDatalessJSON methods. When using SVG, there's fabric.loadSVGFromURL and fabric.loadSVGFromString ones.
Notice that first 2 methods are instance ones, and are called on canvas instance directly, whereas last 2 methods are static ones and are called on "fabric" object rather than on canvas.
There's not much to say about these methods. They work exactly as you would expect them to. Let's take, for example, previous JSON output from canvas and load it on clean canvas:
var canvas = new fabric.Canvas();

canvas.loadFromJSON('{"objects":[{"type":"rect","left":50,"top":50,"width":20,"height":20,"fill":"green","overlayFill":null,"stroke":null,"strokeWidth":1,"strokeDashArray":null,"scaleX":1,"scaleY":1,"angle":0,"flipX":false,"flipY":false,"opacity":1,"selectable":true,"hasControls":true,"hasBorders":true,"hasRotatingPoint":false,"transparentCorners":true,"perPixelTargetFind":false,"rx":0,"ry":0},{"type":"circle","left":100,"top":100,"width":100,"height":100,"fill":"red","overlayFill":null,"stroke":null,"strokeWidth":1,"strokeDashArray":null,"scaleX":1,"scaleY":1,"angle":0,"flipX":false,"flipY":false,"opacity":1,"selectable":true,"hasControls":true,"hasBorders":true,"hasRotatingPoint":false,"transparentCorners":true,"perPixelTargetFind":false,"radius":50}],"background":"rgba(0, 0, 0, 0)"}');
..and both objects "magically" appear on canvas:
So loading canvas from string is pretty easy. But what about that strange-looking loadFromDatalessJSON method? How exactly is it different from loadFromJSON that we just used? On order to understand why we need this method, we need to look at the serialized canvas that has a more-or-less complex path object. Like this one:
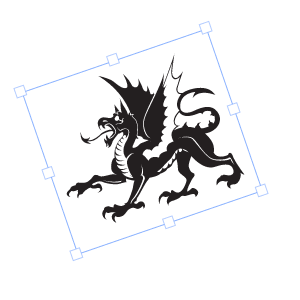
..and the JSON.stringify(canvas) output for this shape is:
{"objects":[{"type":"path","left":184,"top":177,"width":175,"height":151,"fill":"#231F20","overlayFill":null,"stroke":null,"strokeWidth":1,"strokeDashArray":null,"scaleX":1,"scaleY":1,"angle":-19,"flipX":false,"flipY":false,"opacity":1,"selectable":true,"hasControls":true,"hasBorders":true,"hasRotatingPoint":false,"transparentCorners":true,"perPixelTargetFind":false,"path":[["M",39.502,61.823],["c",-1.235,-0.902,-3.038,-3.605,-3.038,-3.605],["s",0.702,0.4,3.907,1.203],["c",3.205,0.8,7.444,-0.668,10.114,-1.97],["c",2.671,-1.302,7.11,-1.436,9.448,-1.336],["c",2.336,0.101,4.707,0.602,4.373,2.036],["c",-0.334,1.437,-5.742,3.94,-5.742,3.94],["s",0.4,0.334,1.236,0.334],["c",0.833,0,6.075,-1.403,6.542,-4.173],["s",-1.802,-8.377,-3.272,-9.013],["c",-1.468,-0.633,-4.172,0,-4.172,0],["c",4.039,1.438,4.941,6.176,4.941,6.176],["c",-2.604,-1.504,-9.279,-1.234,-12.619,0.501],["c",-3.337,1.736,-8.379,2.67,-10.083,2.503],["c",-1.701,-0.167,-3.571,-1.036,-3.571,-1.036],["c",1.837,0.034,3.239,-2.669,3.239,-2.669],["s",-2.068,2.269,-5.542,0.434],["c",-3.47,-1.837,-1.704,-8.18,-1.704,-8.18],["s",-2.937,5.909,-1,9.816],["C",34.496,60.688,39.502,61.823,39.502,61.823],["z"],["M",77.002,40.772],["c",0,0,-1.78,-5.03,-2.804,-8.546],["l",-1.557,8.411],["l",1.646,1.602],["c",0,0,0,-0.622,-0.668,-1.691],["C",72.952,39.48,76.513,40.371,77.002,40.772],["z"],["M",102.989,86.943],["M",102.396,86.424],["c",0.25,0.22,0.447,0.391,0.594,0.519],["C",102.796,86.774,102.571,86.578,102.396,86.424],["z"],["M",169.407,119.374],["c",-0.09,-5.429,-3.917,-3.914,-3.917,-2.402],["c",0,0,-11.396,1.603,-13.086,-6.677],["c",0,0,3.56,-5.43,1.69,-12.461],["c",-0.575,-2.163,-1.691,-5.337,-3.637,-8.605],["c",11.104,2.121,21.701,-5.08,19.038,-15.519],["c",-3.34,-13.087,-19.63,-9.481,-24.437,-9.349],["c",-4.809,0.135,-13.486,-2.002,-8.011,-11.618],["c",5.473,-9.613,18.024,-5.874,18.024,-5.874],["c",-2.136,0.668,-4.674,4.807,-4.674,4.807],["c",9.748,-6.811,22.301,4.541,22.301,4.541],["c",-3.097,-13.678,-23.153,-14.636,-30.041,-12.635],["c",-4.286,-0.377,-5.241,-3.391,-3.073,-6.637],["c",2.314,-3.473,10.503,-13.976,10.503,-13.976],["s",-2.048,2.046,-6.231,4.005],["c",-4.184,1.96,-6.321,-2.227,-4.362,-6.854],["c",1.96,-4.627,8.191,-16.559,8.191,-16.559],["c",-1.96,3.207,-24.571,31.247,-21.723,26.707],["c",2.85,-4.541,5.253,-11.93,5.253,-11.93],["c",-2.849,6.943,-22.434,25.283,-30.713,34.274],["s",-5.786,19.583,-4.005,21.987],["c",0.43,0.58,0.601,0.972,0.62,1.232],["c",-4.868,-3.052,-3.884,-13.936,-0.264,-19.66],["c",3.829,-6.053,18.427,-20.207,18.427,-20.207],["v",-1.336],["c",0,0,0.444,-1.513,-0.089,-0.444],["c",-0.535,1.068,-3.65,1.245,-3.384,-0.889],["c",0.268,-2.137,-0.356,-8.549,-0.356,-8.549],["s",-1.157,5.789,-2.758,5.61],["c",-1.603,-0.179,-2.493,-2.672,-2.405,-5.432],["c",0.089,-2.758,-1.157,-9.702,-1.157,-9.702],["c",-0.8,11.75,-8.277,8.011,-8.277,3.74],["c",0,-4.274,-4.541,-12.82,-4.541,-12.82],["s",2.403,14.421,-1.336,14.421],["c",-3.737,0,-6.944,-5.074,-9.879,-9.882],["C",78.161,5.874,68.279,0,68.279,0],["c",13.428,16.088,17.656,32.111,18.397,44.512],["c",-1.793,0.422,-2.908,2.224,-2.908,2.224],["c",0.356,-2.847,-0.624,-7.745,-1.245,-9.882],["c",-0.624,-2.137,-1.159,-9.168,-1.159,-9.168],["c",0,2.67,-0.979,5.253,-2.048,9.079],["c",-1.068,3.828,-0.801,6.054,-0.801,6.054],["c",-1.068,-2.227,-4.271,-2.137,-4.271,-2.137],["c",1.336,1.783,0.177,2.493,0.177,2.493],["s",0,0,-1.424,-1.601],["c",-1.424,-1.603,-3.473,-0.981,-3.384,0.265],["c",0.089,1.247,0,1.959,-2.849,1.959],["c",-2.846,0,-5.874,-3.47,-9.078,-3.116],["c",-3.206,0.356,-5.521,2.137,-5.698,6.678],["c",-0.179,4.541,1.869,5.251,1.869,5.251],["c",-0.801,-0.443,-0.891,-1.067,-0.891,-3.473],...
..and that's only 5th (!) part of the entire output!
What's going on here? Well, it turns out that this fabric.Path instance — this shape — consists of literally hundreds of bezier lines dictating how exactly it is to be rendered. All those ["c",0,2.67,-0.979,5.253,-2.048,9.079] chunks in JSON representation correspond to each one of such curves. And when there's hundreds (or even thousands) of them, the canvas representation ends up being quite enormous.
What to do?
This is when fabric.Canvas#toDatalessJSON comes handy. Let's try it:
canvas.item(0).sourcePath = '/assets/dragon.svg';
console.log(JSON.stringify(canvas.toDatalessJSON()));
..and the logged output is:
{"objects":[{"type":"path","left":143,"top":143,"width":175,"height":151,"fill":"#231F20","overlayFill":null,"stroke":null,"strokeWidth":1,"strokeDashArray":null,"scaleX":1,"scaleY":1,"angle":-19,"flipX":false,"flipY":false,"opacity":1,"selectable":true,"hasControls":true,"hasBorders":true,"hasRotatingPoint":false,"transparentCorners":true,"perPixelTargetFind":false,"path":"/assets/dragon.svg"}],"background":"rgba(0, 0, 0, 0)"}
Well, that's certainly smaller! So what happened? Notice how before calling toDatalessJSON, we gave the path (dragon shape) object "sourcePath" property of "/assets/dragon.svg". Then, when we called toDatalessJSON the entire humongous path string from previous output (those hundreds of path commands) was replaced with a single "dragon.svg" string. You can see it highlighted above.
When working with lots of complex shapes, toDatalessJSON allows us to do reduce canvas representation even further and replace huge path data representaion with a simple link to SVG.
And now getting back to loadFromDatalessJSON method... you can probably guess that it simply allows to load canvas from a dataless version of canvas representation. loadFromDatalessJSON pretty much knows how to take those "path" strings (like "/assets/dragon.svg"), load them, and use as the data for corresponding path objects.
Now, let's take a look at SVG-loading methods. We can either use string or URL:
fabric.loadSVGFromString('...', function(objects, options) {
  var obj = fabric.util.groupSVGElements(objects, options);
  canvas.add(obj).renderAll();
});
First argument is the SVG string, second one is the callback function. The callback is invoked when SVG is parsed and loaded and receives 2 arguments — objects and options. objects contains an array of objects parsed from SVG — paths, path groups (for complex objects), images, text, and so on. In order to group all of those objects into a cohesive collection, and to make them look the same way as they are in SVG document, we're using fabric.util.groupSVGElements passing it both objects and options. In return, we get either an instance of fabric.Path or fabric.Group, which we can then add onto canvas.
fabric.loadSVGFromURL works the same way, except that you pass string containing URL rather than SVG contents. Note that Fabric will attempt to fetch that URL via XMLHttpRequest, so the SVG needs to conform to the usual SOP rules.
Subclassing
Since Fabric is built in a truly object-oriented fashion, it's designed to make subclassing and extension simple and natural. As you know from 1st part of this series, there's an existing hierarchy of objects in Fabric. All 2D objects (paths, images, text, etc.) inherit from fabric.Object, and some "classes" — like fabric.IText — even form 3-level inheritance.
So how would we go about subclassing one of the existing "classes" in Fabric? Or maybe even creating our own?
For this task we'll need fabric.util.createClass utility method. createClass is nothing but a simple abstraction over Javascript's prototypal inheritance. Let's first create a simple Point "class":
var Point = fabric.util.createClass({
  initialize: function(x, y) {
    this.x = x || 0;
    this.y = y || 0;
  },
  toString: function() {
    return this.x + '/' + this.y;
  }
});
createClass takes an object and uses that object's properties to create "class" with instance-level properties. The only specially-treated property is "initialize", which is used as constructor. So now when initializing Point, we'll create an instance with "x" and "y" properties, and "toString" method:
var point = new Point(10, 20);

point.x; // 10
point.y; // 20

point.toString(); // "10/20"
If we wanted to create a child of "Point" class — say a colored point, we would use createClass like so:
var ColoredPoint = fabric.util.createClass(Point, {
  initialize: function(x, y, color) {
    this.callSuper('initialize', x, y);
    this.color = color || '#000';
  },
  toString: function() {
    return this.callSuper('toString') + ' (color: ' + this.color + ')';
  }
});
Notice how the object with instance-level properties is now passed as a second argument. And first argument receives Point "class", which tells createClass to use it as a parent "class" of this one. In order to avoid duplication, we're using callSuper method, which calls the method of a parent "class". This means that if we were to change Point, the changes would also propagate to ColoredPoint one. To see ColoredPoint in action:
var redPoint = new ColoredPoint(15, 33, '#f55');

redPoint.x; // 15
redPoint.y; // 33
redPoint.color; // "#f55"

redPoint.toString(); "15/33 (color: #f55)"
So now that we went over creating our own "classes" and "subclasses", let's see how to work with already-existing Fabric ones. For example, let's create a LabeledRect "class" which will essentially be a rectangle that has some kind of label associated with it. When rendered on canvas, that label will be represented as a text inside rectangle. Something similar to previous group example with circle and text. As you're working with Fabric, you'll notice that combined abstractions like this could be achieved either by using groups or by using custom classes.
var LabeledRect = fabric.util.createClass(fabric.Rect, {

  type: 'labeledRect',
  // initialize can be of type function(options) or function(property, options), like for text.
  // no other signatures allowed.
  initialize: function(options) {
    options || (options = { });

    this.callSuper('initialize', options);
    this.set('label', options.label || '');
  },

  toObject: function() {
    return fabric.util.object.extend(this.callSuper('toObject'), {
      label: this.get('label')
    });
  },

  _render: function(ctx) {
    this.callSuper('_render', ctx);

    ctx.font = '20px Helvetica';
    ctx.fillStyle = '#333';
    ctx.fillText(this.label, -this.width/2, -this.height/2 + 20);
  }
});
It seems like there's quite a lot going on here, but it's actually pretty simple.
First, we're specifying parent "class" as fabric.Rect, to utilize its rendering abilities. Next, we define "type" property, setting it to "labeledRect". This is just for consistency, since all Fabric objects have type property (rect, circle, path, text, etc.) Then there's already-familiar constructor (initialize) in which we're utilizing callSuper once again. Additionally, we set object's label to whichever value was passed via options. Finally, we're left with 2 methods - toObject and _render. toObject, as you already know from serialization chapter, is responsible for object (and JSON) representation of an instance. Since LabeledRect has the same properties as regular rect, but also a label, we're extending parent's toObject method and simply adding label into it. Last but not least, _rendermethod is what's responsible for actual drawing of an instance. There's another callSuper call in it, which is what renders rectangle, and additional 3 lines of text-rendering logic.
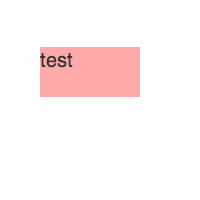
Now, if we were to render such object:
var labeledRect = new LabeledRect({
  width: 100,
  height: 50,
  left: 100,
  top: 100,
  label: 'test',
  fill: '#faa'
});
canvas.add(labeledRect);
..we would get this:
Changing label value or any other usual rectangle properties would obviously work as expected:
labeledRect.set({
  label: 'trololo',
  fill: '#aaf',
  rx: 10,
  ry: 10
});

Of course at this point, you're free to modify behavior of this "class" any way you want. For example, making certain values default, to avoid passing them every time to constructor. Or making certain configurable properties available on the instance. If you do make additional properties configurable, you might want to account for them in toObject and initialize:
...
initialize: function(options) {
  options || (options = { });

  this.callSuper('initialize', options);

  // give all labeled rectangles fixed width/heigh of 100/50
  this.set({ width: 100, height: 50 });

  this.set('label', options.label || '');
}
...
_render: function(ctx) {

  // make font and fill values of labels configurable
  ctx.font = this.labelFont;
  ctx.fillStyle = this.labelFill;

  ctx.fillText(this.label, -this.width/2, -this.height/2 + 20);
}
...
In order for this class to be cloned and saved/restore, you need to add a `fromObject` static method and on top of that, the subclass to be added to the main fabricObject:
// standard options type:
fabric.labeledRect.fromObject = function(object, callback) {
  return fabric.Object._fromObject('LabeledRect', object, callback);
}
...
// argument + options type:
// in this example aProp is the property in the object that contains the value
// that goes in someValue in `new fabric.MyClass(someValue, options)`
fabric.labeledRect.fromObject = function(object, callback) {
  return fabric.Object._fromObject('LabeledRect', object, callback, 'aProp');
}
On this note, I'm wrapping up the 3rd installment of this series, in which we dived into some of the more advanced aspects of Fabric. With help of groups, classes and (de)serialization you can take your app to a whole new level.
Read Part 4.